Pot Hangers
I spent Aug. 10 - Oct. 20, 2018 attending Bushcraft School off the grid in Northern Maine. This post recounts part of that journey.
I had never owned a fixed blade knife before. I’ve had pocket knives and multi tools. I’m an expert at having them confiscated in airports. I’ve used awls and gouges for woodcarving but never a four-inch blade on a sturdy handle to fell saplings and carve wood.
Edge tools keep people alive in the backwoods but because it can take a lot of time to seek medical care in case of emergency, they can also be deadly.
Always carve away from yourself. Keep your knife in your hand or in a sheath, never on the table. Brace your elbows, extend your arms. Carve with the grain, not against it. There were so many rules and tricks I felt overwhelmed at first. I bought my knife off Amazon and it arrived at Bushcraft school about a week in. It had a camouflaged handle and sheath that could clip to a belt. It was huge, and unwieldy.
I have a scar on my left thumb from where the blade punctured me between the knuckles. I was carving the handle for my crooked knife and the conversation was funny. I laughed. I slipped. I cut myself and I bled. I was lucky it wasn’t deeper and that it healed alright. It certainly hurt for days.

Molly uses a hand saw to carve an X in a pine trunk to make a pot hanger.

David carved the ends of his pot hanger to make them flat.
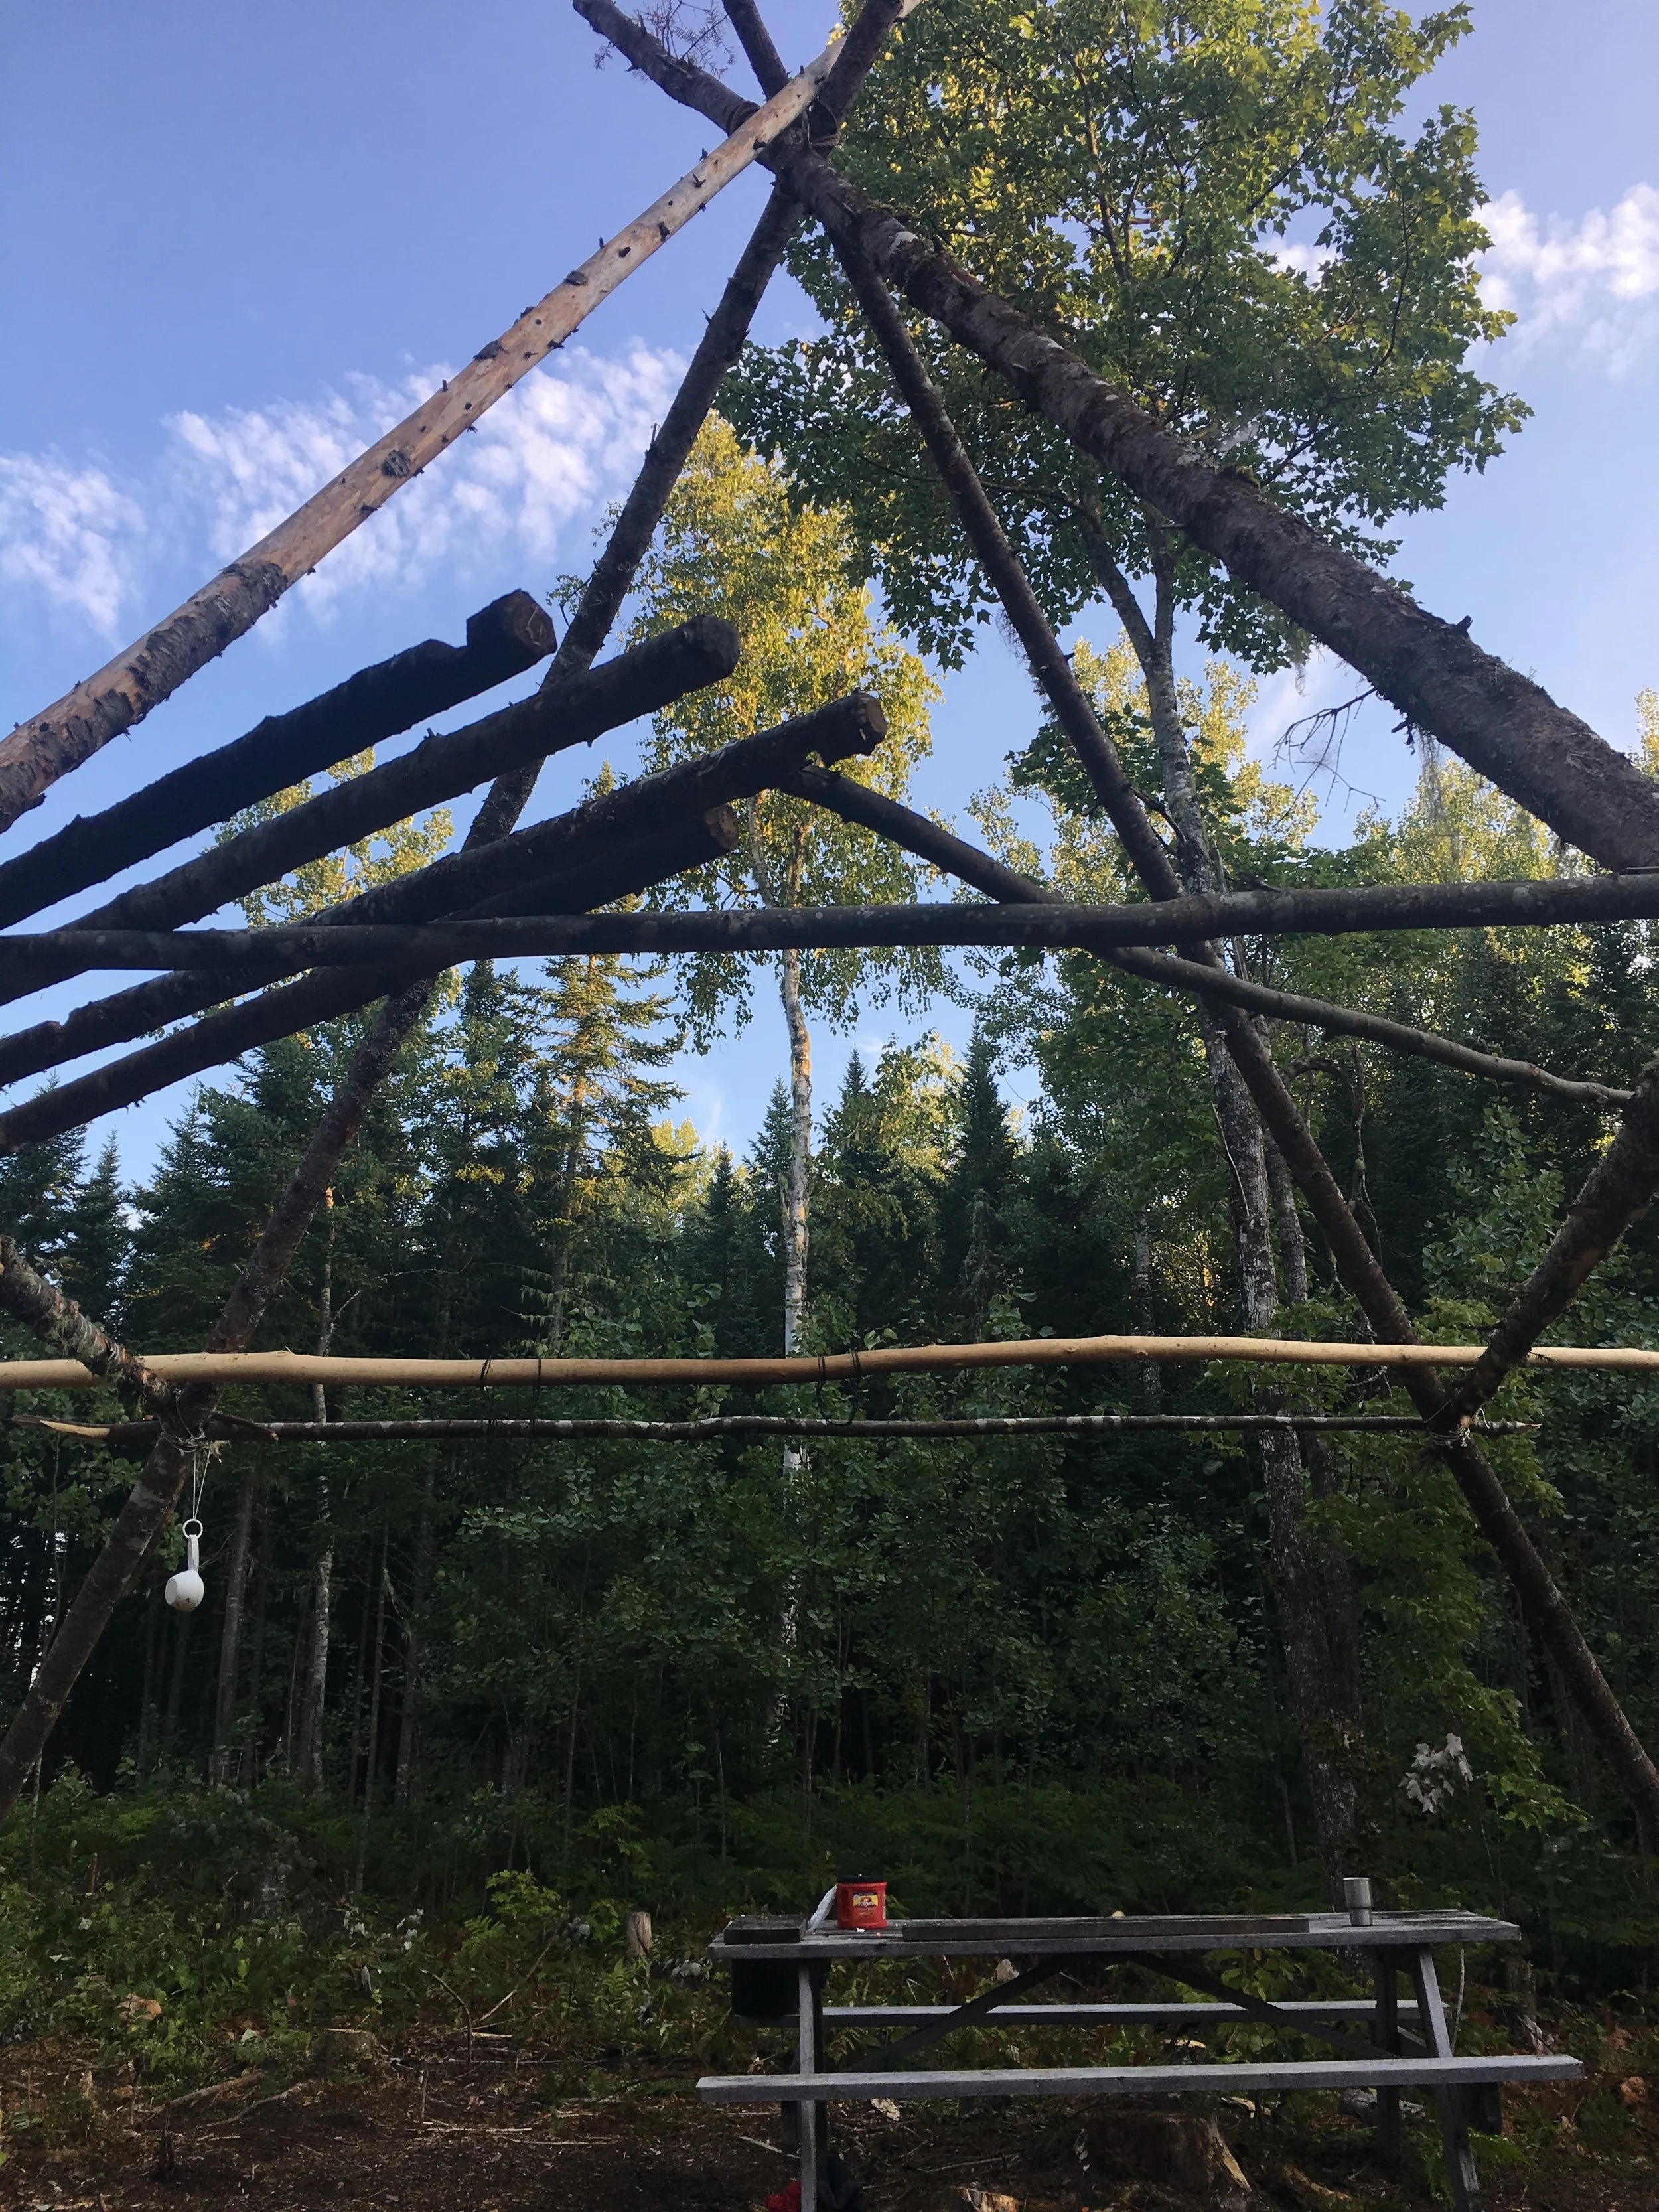
The first carving project we had was to make a pot hanger to hang with wire above the cook fire. A good pot hanger should be made of green pine so it’s less likely to burn. Five to six feet is a good length depending on how tall the quad pod cook rig is and how close to the flames you want your pot.
Pine tree branches grow in rings. There’s a year’s worth of growth between the rings of knots. I limbed my section and found the ring towards the bottom of the front of my pot hook. Using a handsaw I cut an X just above the knots to make four triangles. I left the bottom triangle intact. This will be the hook where the pot hangs from. I cut out the left, right and top triangle with my knife. I used the knife and a stick as a baton to hit the blade and chip out the green wood.
On the back of the pot hanger, towards the top, but beneath the top ring of knots, I sawed another X. I sawed about half way through the stick, but not more. I sawed another X 6 inches below the first. For a long pot hanger, a third X might be necessary. These Xs allow the hanger to be moved up and down on wire to control the temperature and amount of flames reaching the food.

Finished pot holders hang from the quad pod.
The trick when cutting the top with the knife is to cut out the bottom triangle, the left and the right. The whole project is ruined if the top and bottom match. The must be opposite so the hanger can hang on the quad pod and the the pot can hang on the hanger. This doesn’t seem like a difficult concept, but more than one pot hanger went into the firewood pile after the carver realized he carved out the wrong parts of the X.

A triple layer of wire in a U shape attached at both sides to the crossbar of the quad pod makes for easy hanging. Just make sure to remove the pot hanger after removing a pot. Green wood can burn.
A favorite pot hanger at our long fire was top heavy and automatically lifted itself up away from the fire when a pot was removed. This project doesn’t look like much, but it was a great introduction to knife skills that resulted in a useful item that was used every day in camp.